Litter Management
By Blake Gibson jones-hamilton Company
Features Business & Policy Trade Litter management is a crucial part to maintaining a healthy environment Poultry Production ProductionBest Management Practices for Maintaining Optimal Brooding Conditions
 At clean out, it’s vital to remove all litter down to the pad as well as dust from fixtures (pulleys, tensioners, screens, louvers, lights, etc.). This includes litter along the sidewalls, in the corners and under the fans. Any litter left in the house will cause problems later when the floors are heated.
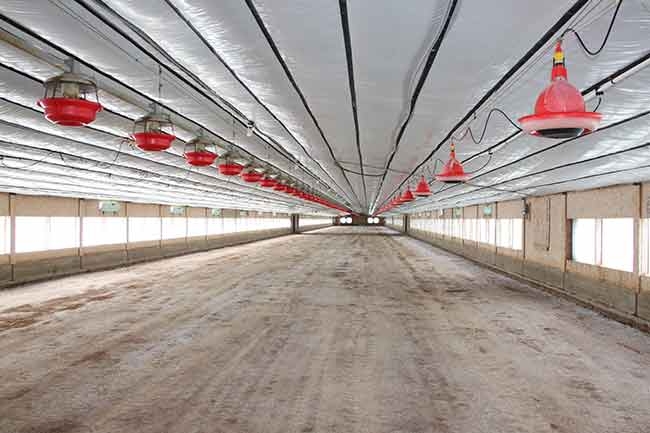
Litter management is a crucial part to maintaining a healthy environment and reducing challenges for every flock. Managing the litter will become increasingly vital as more companies shift toward antibiotic-free programs, or when new bedding material is scarce or extremely costly to replace.
Litter serves as the foundation of a flock’s success and careful management is required to ensure a positive impact on a flock’s performance. If proper management isn’t made a top priority, producers will more than likely be battling higher fuel costs and poor performance. Many producers take a reactive approach to litter management, but once litter has been mishandled, it is difficult to correct and in some cases it is more advantageous to clean out and start over with new bedding. That’s why it’s imperative to carefully manage litter from the time a clean out is performed so the new litter can be utilized for many flocks thereafter. In fact, litter preparation for the next flock should start while the current flock is in the house. Determining when cake formation starts in a flock and making proper changes to address the cause will ensure a much healthier floor environment.
Begin with Best Management Practices
Smart litter management begins with the development of and adherence to best management practices (BMPs) for waterlines, ventilation and litter conditions. For maximum performance, these BMPs should address these three areas. Begin by carefully observing the litter to identify issues with current conditions:
- If you see: Donuts under the drinkers or continued wetness. Then: Check waterline flow, pressure and regulators as it indicates leaking nipples or improper water pressure.
- If you see: Slick cake along the length of drinker lines. Then: Check waterline height and pressure, and the regulator as it can be malfunctioning.
- If you see: Cake along the walls, doors, fans or center of the house. Then: Tighten or repair air leaks through curtains, sidewalls, static pressure systems, fan louvers and doors. Air leaks create drafts that chill birds and cake litter.
- If you see: Floury litter after decaking. Then: Focus on decaking techniques to minimize over-decaking or decaking too deep in the dry pack. Identify cake and focus just there, not on the whole house. Remember, fluffy, nice litter doesn’t grow the best birds. In fact, over management of litter causes more flock health issues than producers realize.
Despite these interventions, in some houses less than optimal litter conditions demand micro management to prevent the onset of noxious gases like ammonia. This will help manage bacterial population, viral and cocci challenges.
Starting the Flock Off Right with Proper House Clean Out
When cleaning out, it’s vital to remove all litter down to the pad as well as dust from fixtures (pulleys, tensioners, screens, louvers, lights, etc.). This includes litter along the sidewalls, in the corners and under the fans. If necessary, remove litter by hand. Any litter left in the house will cause problems later when the floors
are heated.
Once the litter has been removed, clean and disinfect ceilings, sidewalls and any other hard surface with a strong virucidal and bacterial disinfectant. At this point, producers may want to consider applying an acidifier such as sodium bisulfate to the dirt pad; especially if performance declines or disease outbreaks without a clear reason have been occurring. The dirt pad acts as a sponge and absorbs water, ammonia, bacteria and other challenges over time. Therefore, lowering the pH of the floor environment will rid the pad of any ammonia that might volatize off once new bedding and heat is added. Also, lowering the pH to a very low level will impact the ability of some microbial growth.
If you have a concrete pad there is no benefit to applying sodium bisulfate before bird placement since there will be no ammonia to react with the product. However, once the birds have been on the litter for one to two weeks, sufficient ammonia will exist. The ammonia will react with a sodium bisulfate litter treatment while also working to suppress pH low enough to negatively impact microbial populations.
If the litter is being reused, the moment the last bird leaves, shut the house tightly in order to retain heat from the previous flock and remove excess moisture in the litter and floor. Ammonia concentrations will continue to rise while the house is closed, but unless you’re working in the house there is no need to ventilate. Ventilating during this time will actually shut down ammonia release and accelerate heat loss from the previous flock. Minimal ventilation may be required in the first 48-72 hours to prevent condensation, but during the daytime only. This will help reduce corrosive condensation from forming on equipment, sidewalls and ceiling. Once the condensation subsides the house should be shut down with no ventilation until preparation for placement starts.
Proper Pre-heating Procedures
After the house is cleaned out and the pad treated, new litter should be put in at a depth of 4-6 inches. Select clean dry bedding that preferably has less than 15% moisture. It’s critical to understand how different bedding substrates handle absorption of moisture, compaction and decomposition in order to know how to maximize the life of the litter and the number of flocks that can successfully utilize it. Once the new litter is in, the house should be shut again to keep litter dry and clean.
When it’s time to pre-heat, begin 48-60 hours prior to bird placement to reach the desired placement temperature in the core of the litter base. Remember, new litter can be damp, so the pre-heating period may need to be increased. Damp litter can easily cool chicks once placed, which can make them susceptible to many challenges that can reduce profitability from the very moment of placement. Whether the litter is new or built-up, the core litter temperature is extremely critical. Surface temperature is just that, on the surface; but core temperature impacts the birds’ ability to stay warm as well as ammonia volatilization and microbial challenges.
If you’re using built up litter, it is recommended to treat litter with sodium bisulfate just prior to bird placement to reduce the stress of ammonia and bacteria. Your treatment level will depend on litter quality, ammonia load and microbial stress.
Once birds are in the house and you’re working to maintain healthy litter conditions, use tilling as a last resort, as it creates more surface area, releases large amounts of ammonia and reduces litter’s ability to wick moisture off the surface. If tilling is required, go no deeper than the thickness of the caked areas to minimize surface area. Once tilling is finished, treat the area immediately with sodium bisulfate to eliminate ammonia. The same will happen if windrowing or litter manipulation is utilized as a heat treatment. More surface area equals more released ammonia—even.
if microbe levels are decreased.
The Role of Water Management
House conditions and litter ecology are also impacted by bird diet and water management. It begins with the gut of the bird. The first line of defense for challenges is in the GI tract. Gut receptor sites will be seeded down with either good bacteria or challenging bacteria. The sooner the normal healthy microflora can be established, the less likely the bird’s gut will be colonized by unwanted bacteria such as salmonella and clostridium.
Research shows that acidifying drinking water allows for the crop to be acidified both before and after the normal crop flora becomes established (Byrd et al, 2001). Providing the bird with water at a pH below 4.0 for its first 7 to 10 days of age assists in the establishment of normal flora.
The method used to lower pH matters. If organic acids or a mixture of organic acids are being used for crop acidification or waterline management, birds will typically back off of the water. This is due to the bitter/sour taste created when the hydrogen ions that make up the molecules of acid are released in the mouth. The use of a mineral acid such as sodium bisulfate allows the pH of the water to be lowered to biologically significant levels without negatively impacting water consumption; this is because hydrogen ions are displaced in the manufacturing process making the water more desirable and palatable. Sodium bisulfate is effective in cleaning up the waterlines as well.
Getting a flock off to the right start is critical not only for the birds, but also for financial gain. It’s easy to forget the small details that, in the end, cost greatly. A solid, strong foundation and the understanding that anything that is done to the environment that the birds are in direct contact with ( i.e., water, feed, air and the floor) will impact them for better or for worse. An optimally managed environment provides the best chance of maximizing a flock’s health and financial potential. There are no silver bullets to litter management of ammonia and bacterial challenges. Focusing on the things that impact or produce them, however, is the key to a successful flock.
Print this page