Minimum Inlet System Design
By Shawn Conley
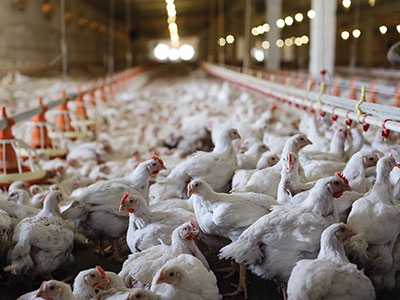
Features Bird Management Production Poultry Production ProductionModular inlets are ideal, but setting up inlets correctly can be a money-saver
 Inlet type, placement, quality, quantity, and management are massive factors in the profitability of a poultry operation, altering energy costs and flock performance
William Arthur Ward wrote, “The pessimist complains about the wind; the optimist expects it to change; the realist adjusts the sails.” A poultry farmer could replace the word “sails” with “inlets”, and have a great piece of advice for ventilating poultry barns. Inlet type, placement, quality, quantity, and management are massive factors in the profitability of a poultry operation, altering energy costs and flock performance.
In the past, barns had intake fans to blow the air in, air cannons (PVC pipe run into the barn along the ceiling) to (hopefully) direct the air where we wanted it to go, sliding doors with fins built in, and most commonly (and still commonly used) —continuous baffle inlets. Most operators have graduated from the days of intake fans and air cannons, and those that haven’t know that they are not ideal methods to ventilate. But, the continuous inlet lives on. A brand new baffle inlet isn’t the worst ventilation method, although it still leaves a lot to be desired. It is very difficult to direct air properly and get the flow required to shoot the air to the center of the barn or further with a 200 – 500’ x ¼” opening. Even at the right static pressure, the air doesn’t have enough mass to maintain momentum. On top of this, it is nearly impossible to get a consistent opening of ¼ or ½”, and the issue of air momentum is pretty much out the window when using variable speed exhaust. The end result, generally, is that heaters run too much, dropping air onto the floor creating wet litter and drafting of birds.
What can we do to prevent these problems? Installing the proper inlet system can make the job a lot easier. There are a couple of excellent options, but we can start with the least expensive suggestion, which is a simple modification to your continuous baffle that has worked great in many buildings. For example, by simply cutting a 4’ opening in the baffle every 16’ in a 40’ wide barn with a 12” opening, enough air can be supplied for minimum ventilation (about four to five CFM per square foot of floor space, assuming 500 CFM per square foot of inlet opening). As always, I recommend to run timer fans instead of variable speed, and ensure that only enough inlets to match the fans in use are allowed to open at about 1.5 – 3” while maintaining around a 0.1” WC of static pressure. This might mean only using a third to a half of your sidewall inlet capacity in the initial stages. In the case of all inlets, it is best to run them on static pressure control, as opposed to manually opening inlets or pre-setting percentages because wind and weather can greatly influence the static pressure from moment to moment or day to day.
The second, and more ideal solution, is to add modular sidewall and/or ceiling inlets to the system, or in the case of new construction, install only those two types with no baffle inlets. As general guidelines, in a tunnel ventilated barn, we want to get to about 5 or 6 CFM per square foot of floor space with the sidewall inlets, 3 or 4 in a cross-ventilated or curtain barn, and 6 to 7 in a brooder barn. Ceiling inlets added into any system should have a capacity of about 1 to 1.5 CFM per square foot because they will only be used for the initial stages of ventilation with young birds or cold weather for bigger birds. The biggest advantage of adding the ceiling inlets is the capability to run more air through the barn without utilizing heat, especially on sunny, cold days.
Choosing the right inlet and laying them out in the building is the next step once the CFM capacity of the system is established. The first consideration is obviously going to be making sure it will fit in the space available. For wall inlets, it is easiest to install 44.5” x 12” inlets, but in a curtain barn, it may be necessary to install a 44.5” x 8” to fit above the curtains, or a drop down inlet in the ceiling at the wall. The drop down inlet is hinged at the corner of the wall and ceiling, and the air supply is through the overhang outside over the top of the wall plate. The airway is blocked in to keep hot attic air from entering the inlet. If the barn has 24” stud spacing, it is not economical to build a header for so many inlets; in that case we would actually use a 22.5” x 12” unit. Regardless of the size of the inlet, the one consistent characteristic is that with the existing technology, a curved European style door is the best way to go. No matter how open the door is, the tendency of the air will always be to travel toward the ceiling as long as the static pressure is adequate. The tendency with a flat door inlet is for the air to follow the direction the door is pointing toward, even if it is away from the ceiling. Just a couple other notes on sidewall inlets: it is always recommended to use a counterweight at the end of the line opposite the actuator. This will ensure that all the inlets in the zone open equally, and if steel rod is used instead of aircraft cable, the inlets should remain even as the rod will not stretch. Also, inlets that actually are spring loaded closed seem to have the best control. Ideal placement is as close to the ceiling as possible, or in the case of a barn where baffles are also installed, as close to the bottom of the baffle as possible.
Ceiling inlets are great for broiler barns, turkey brooders, or any other barn used for brooding. The style is not quite as important. Whether a two-way or four-way inlet is used, the air travels well along the ceiling, and puts the cooler attic air in the right place to mix with the hot air by the ceiling. I recommend the use of actuated units rather than gravity controlled because the static pressure can be metered, all inlets will open together, and when the attic gets hot, the system can be set up to close them and move to the sidewall inlets, and vice versa.
What it all comes down to is that modular inlet systems are the way to go, but there are some important considerations when setting them up. From choosing the right style, quantity, and quality, to running static pressure control and using counterweight, everything counts. Its well worth the time and cost to make changes like this, and it will almost unfailingly result in better bird performance.
Print this page